Prerequisites
In this section of the Guide, we will cover the following topics:
- Installing and configuring AWS CLI, Terraform CLI and git
- Setting up Amazon Route53 DNS
- Setting up Amazon IAM User for CLI
- Preparing SSL Certificate in Amazon Certificate Manager
- Generating SMTP Credentials for Amazon SES
1. Installing Required Software
To install AWS CLI version 2, please follow the link to respective AWS User Guide.
To install Terraform CLI, please follow the link to respective HashiCorp Lear Tutorial.
To install Git, please follow the link to respective Git Tutorial.
2. Configuring Amazon Route53
To use the Solution, you should have your domain in Amazon Route53 and the appropriate subdomain which will be used to serve the Application. See the picture below for more information.
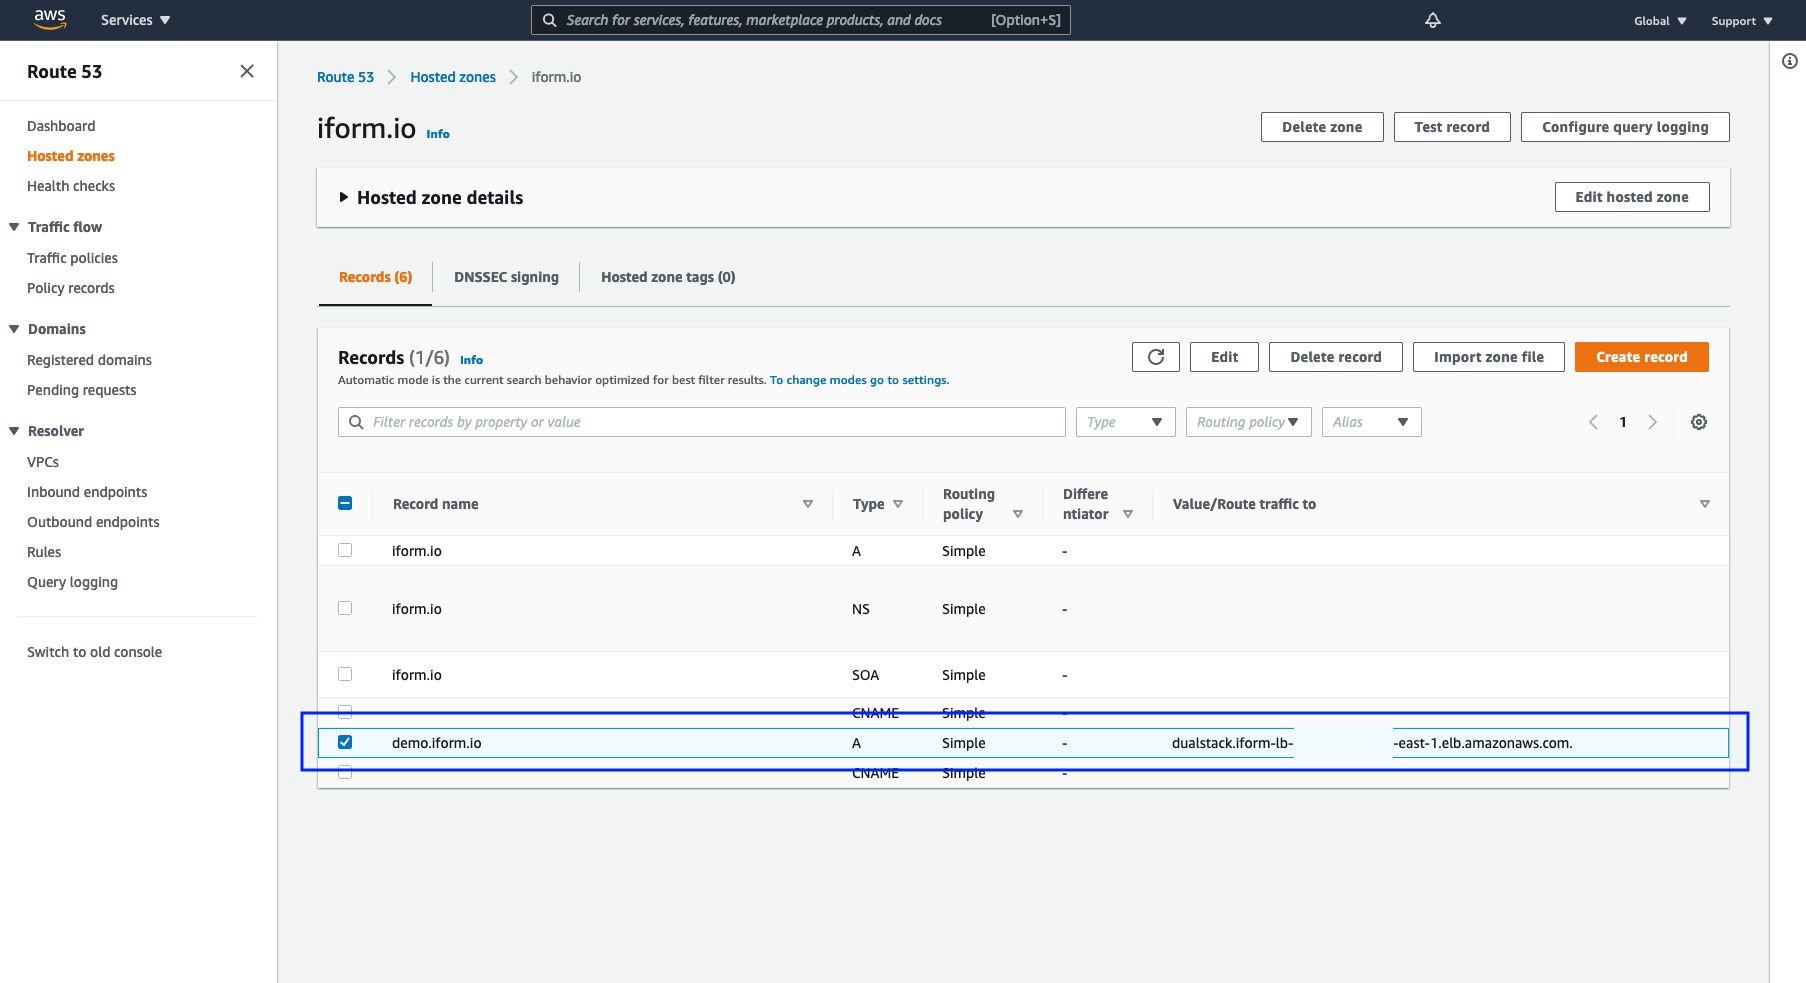
In this example, we have a hosted zone iform.io and a subdomain demo which we will use to serve the iForm App. Please note, you will need to set the value (in our example, that is dualstack.iform-lb...) after the deployment.
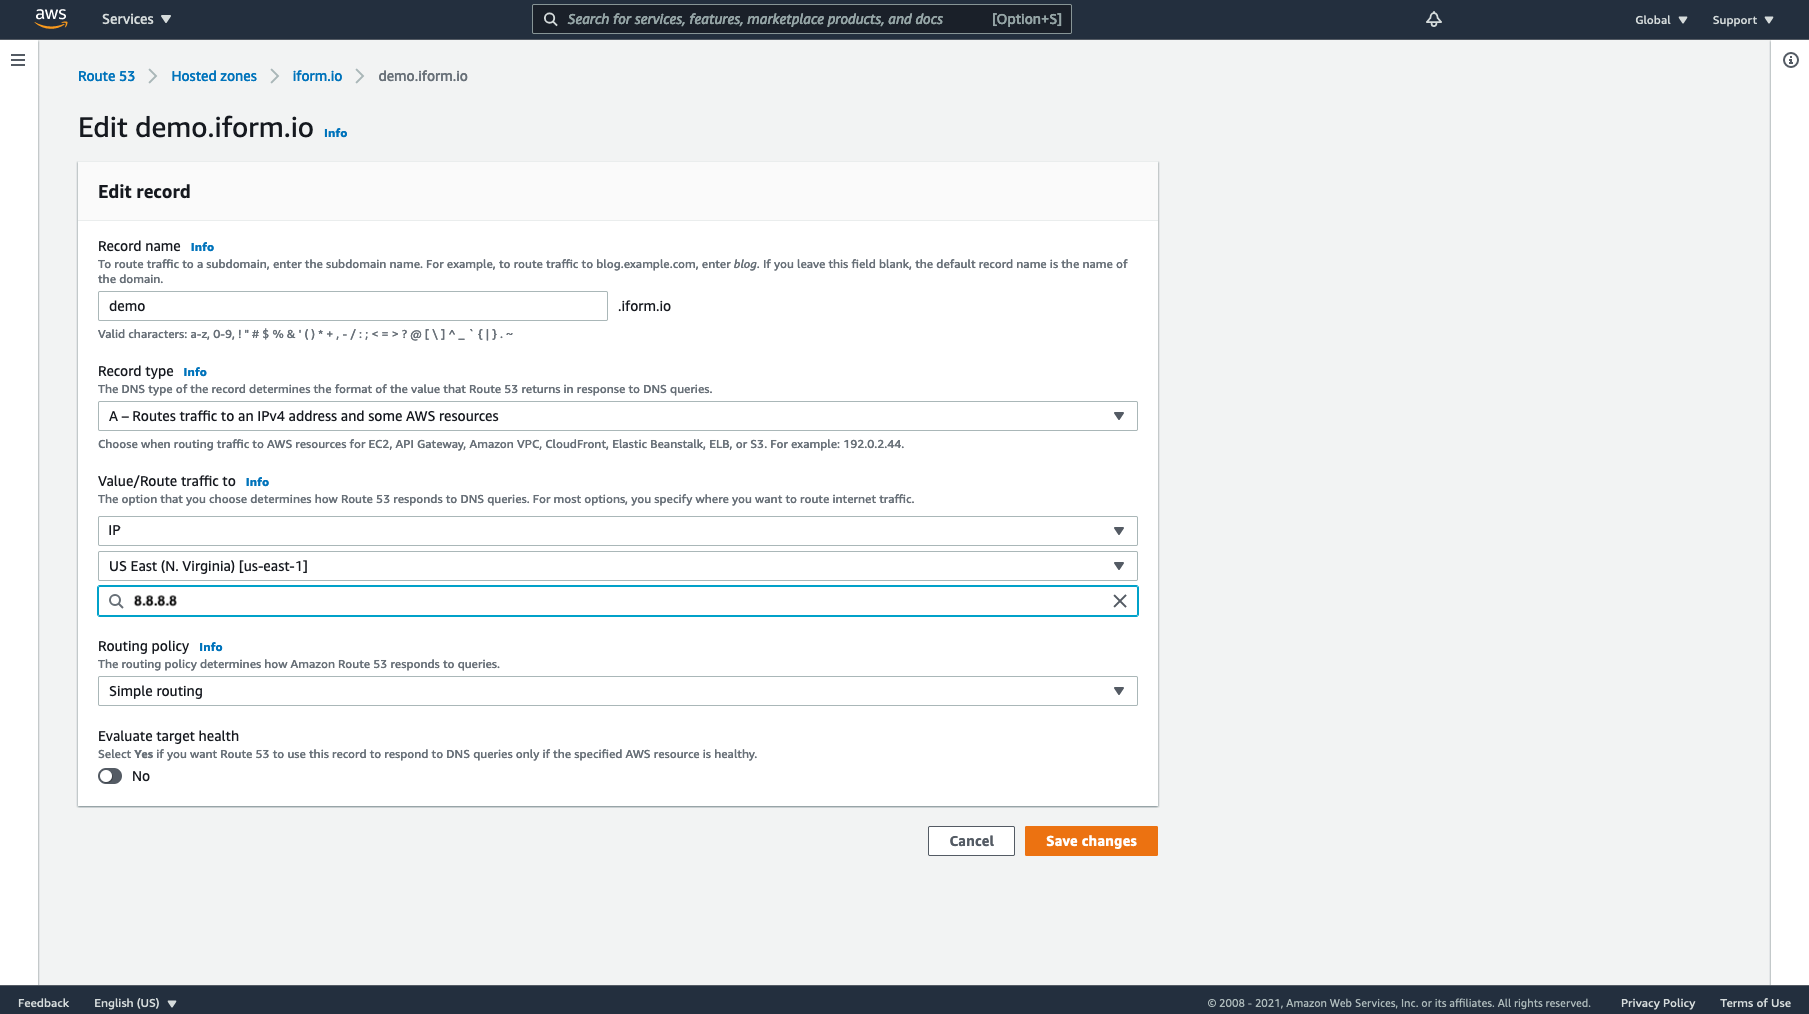
For now, you only need to create your A Type DNS record with any IP as a value, for example, 8.8.8.8.
3. Preparing SSL Certificate in Amazon Certificate Manager
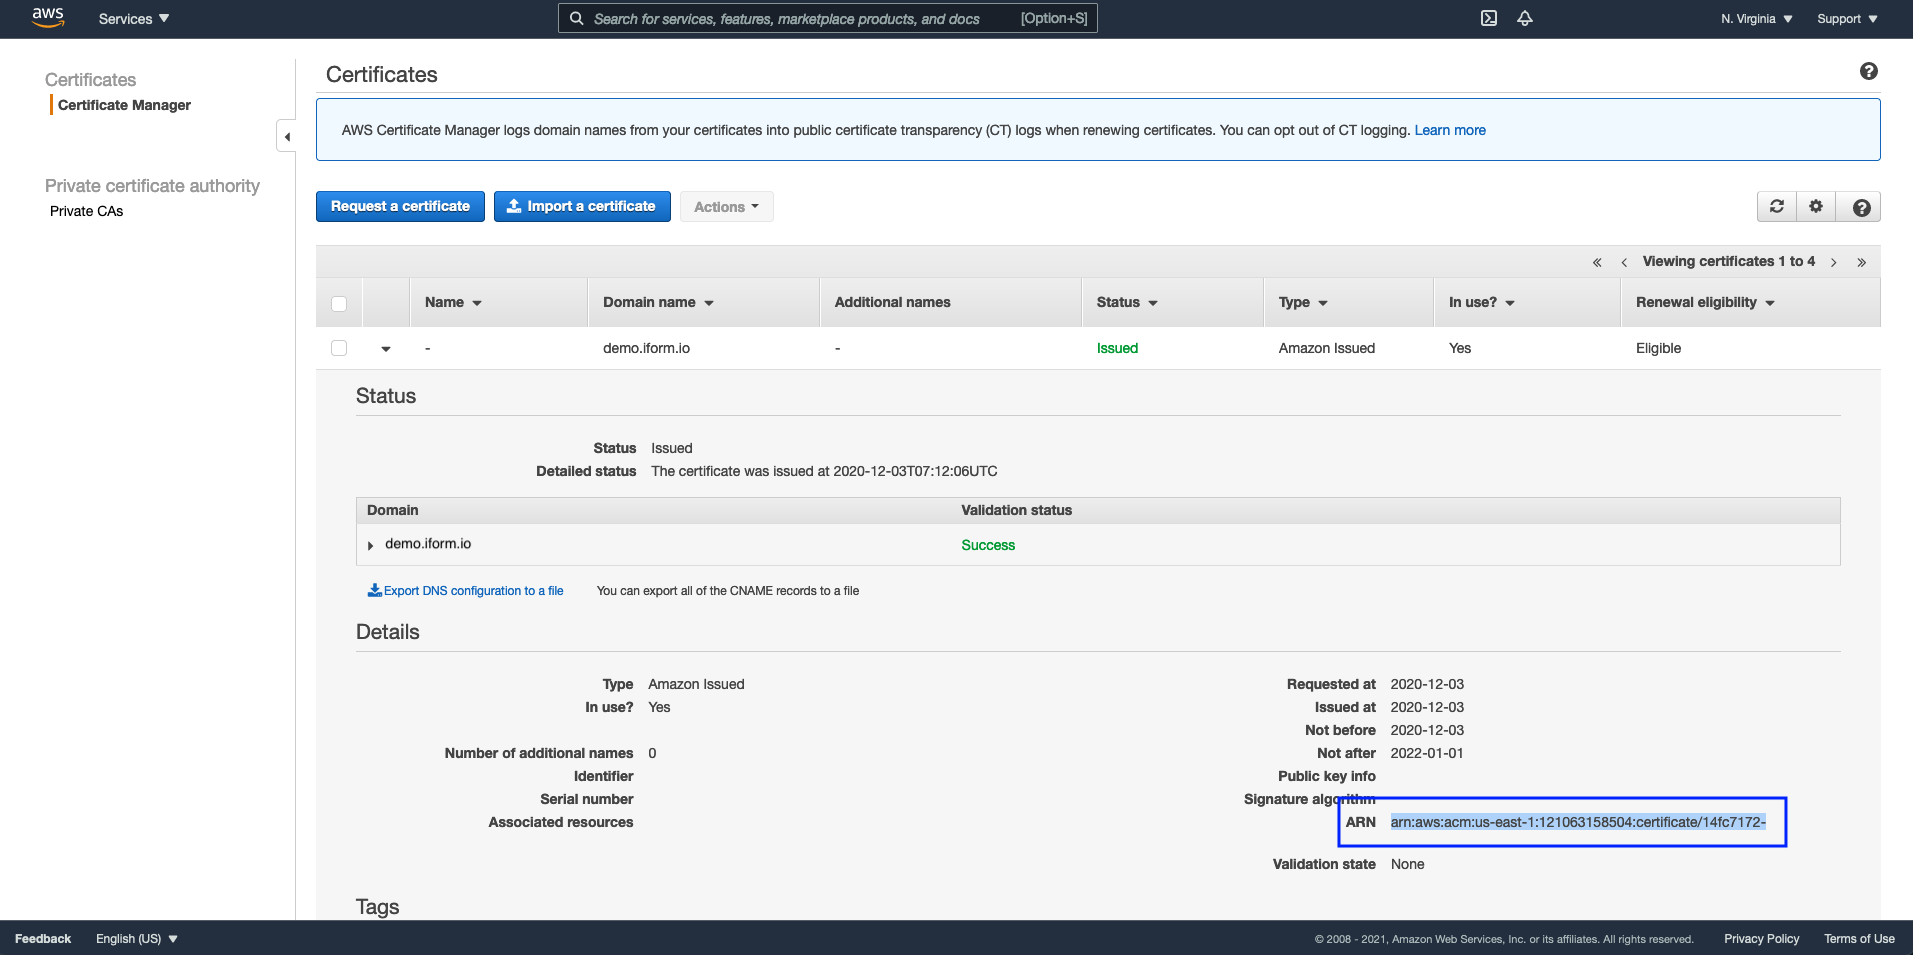
Please prepare your Certificate ARN in Amazon Certificate Manager before deployment. See the picture below for more information.
4. Amazon IAM User and Permissions
To use Terraform Template, you must provide AdministratorAccess permissions for your CLI user.
Please do not use your root account to deploy this Solution.
We encourage you to follow AWS’s best practices for securing your AWS Account. For more information, please follow this link to respective AWS Knowledge Center
To deploy the iForm App, you should create a brand new user and attach AdministratorAccess AWS managed policy in AWS IAM Service.
5. Generate SMTP Credentials for Amazon SES
The iForm Application must be configured with valid Amazon SES SMTP credentials to send system emails. Please follow this link to Amazon SES Developer Guide on how to obtain your Amazon SES SMTP Credentials.